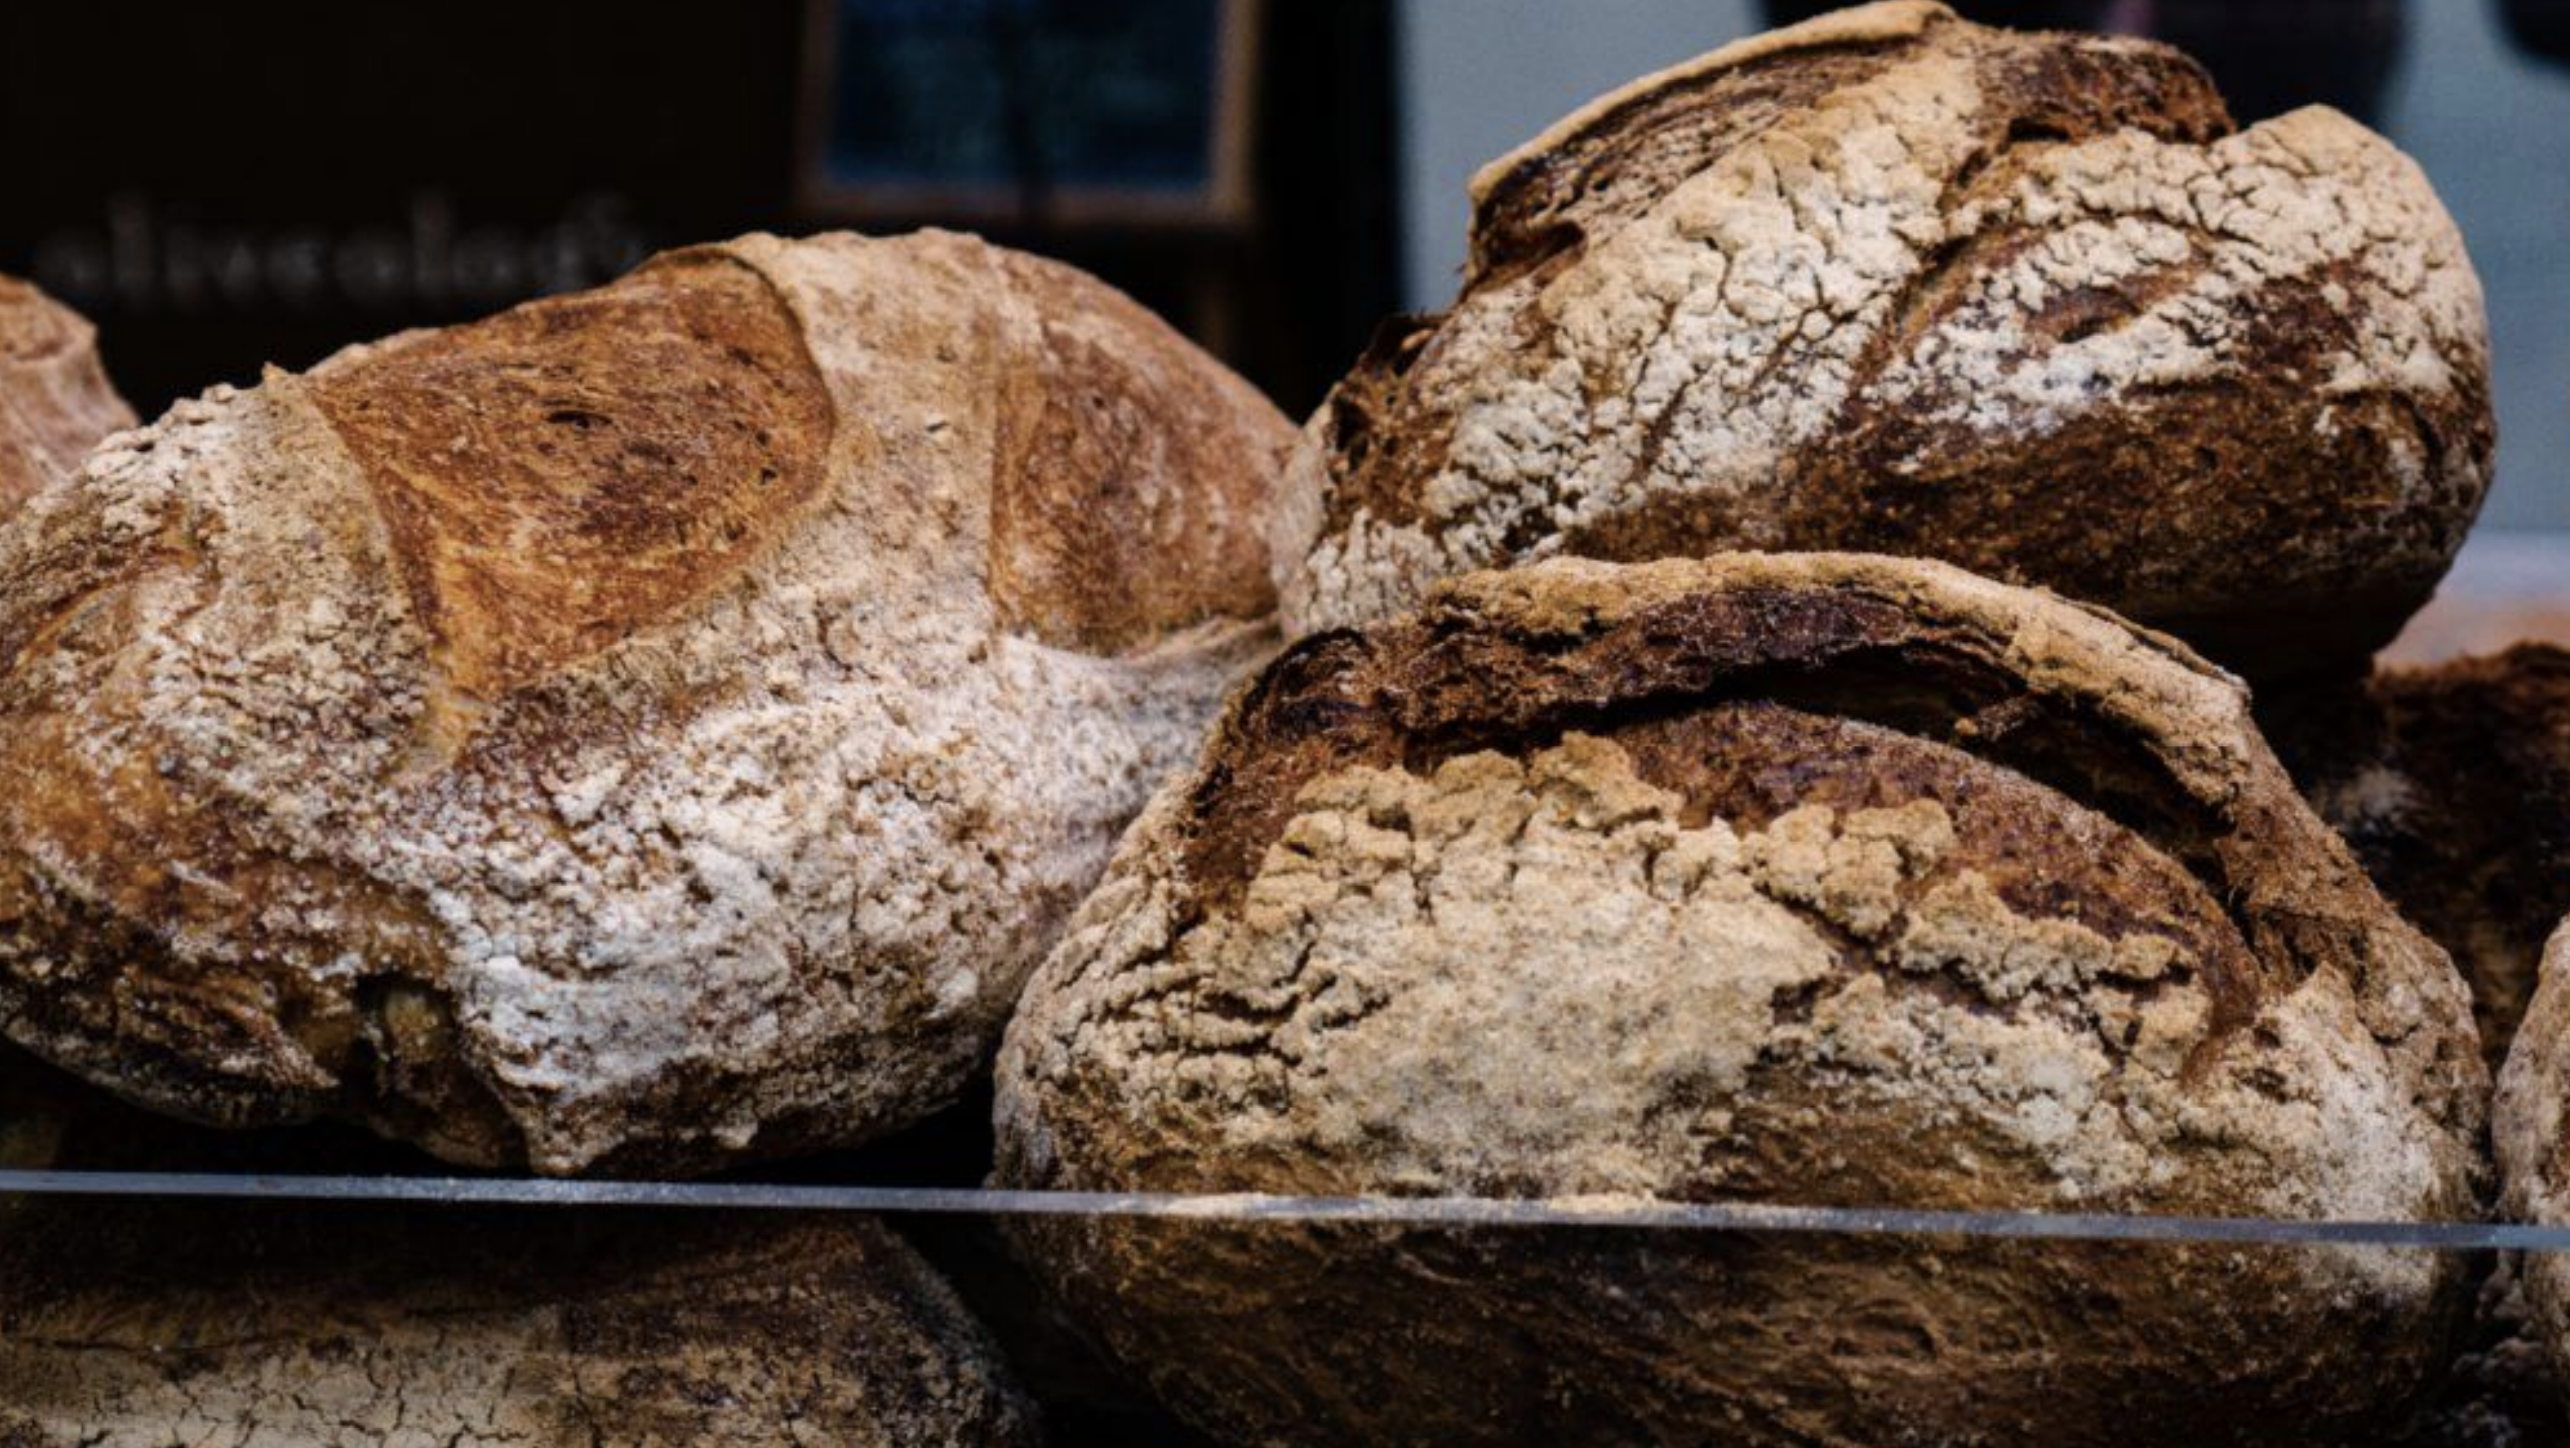
For many, sourdough represents the antithesis of culinary expression. Arguably it’s the most rewarding, humbling and sometimes frustrating thing you can make in the kitchen. Fortunately however, there are only four ingredients – Water, Flour, Salt, and Time.
To be completely candid, the process in total will take a couple days. However, don’t let that deter you as it only requires a small amount of active labor – most of the time you are just sitting around while your dough kicks back and relaxes.
While there are only a few ingredients in sourdough bread, the difference between good and great bread really lies in the technique and ability to adapt to things like temperature or humidity.
That’s why I created a list of all the things I have learned, tips I’ve borrowed, and recipes I trust. I hope this helps you along your bread making journey.
What is sourdough bread?
Sourdough refers to bread that has been levained by natural (or wild) yeast. This natural yeast is used in place of instant or active baking yeast and comes from a culture called a sourdough starter or “mother”.
The process of making sourdough bread has been used by humans for thousands of years and involves a fermentation process in which the natural yeast and bacteria convert flour (carbohydrates) and water into sugar.
As a byproduct of this process, the natural yeast releases lactic acid giving this bread the “sour taste” and also carbon dioxide gas (which creates the signature holes – or “crum”).
What is a sourdough starter?
Sourdough starter is a culture of natural yeast. Similar to the cultures of bacteria and yeast used to make beer, wine, or yogurt.
When making bread, a baker will add sourdough starter to a dough which takes the place of commercial or active dry yeast. The starter helps the bread to rise and ferments the flour and water to create the sour taste.
Because the fermentation process takes longer to occur in naturally leavened bread, this gave rise to the creation of instant or active yeast which can cut down on the process by more than half the amount of time. However with most things in life, you can’t rush perfection and the taste one achieves through the process of natural fermentation is worth the wait.
What equipment do I need to make my own sourdough bread?
Kitchen Scale (optional but highly recommended) – $23
Bread Banneton (optional but recommended) – $29
Glass mixing bowl – $24
Bench Knife – $10
Dutch oven / combo cooker – $43
Why do bakers work in percentages and what does hydration mean?
To scale recipes up or down, Bakers work in percentages. This also makes it easy to adjust recipes.
Now this is going to seem a bit confusing at first but I promise it’s not to difficult. All the percentages are based on the amount of flour (refer to the chart below). if a recipe calls for 70% Hydration what they are saying is for every 1000g of flour there should be 700g of water.
In that same recipe it might call for 15% starter which would mean that for every 1000g of flour, there should be 150g of starter.

How does hydration change the bread?
Scientifically speaking, more water means the yeast can become more active and efficient at consuming the food source (flour/sugars). The dough will be softer and more pliable which makes it easier to rise as the carbohydrates and sugars are converted to CO2. The result is a dough with great fermentation and large holes (what bakers refer to as “an open crumb”).
However, the downside is that the dough is more difficult to work with, it’s incredibly sticky and when your starter is not as active, the soft supple dough will not have the strength to stand tall. In addition, if the gluten doesn’t develop properly you will end up with a flat Frisbee shaped dense bread.
Generally speaking, the more you become adept at baking with higher hydration dough mixes, the easier it is and the lighter the bread will be. It took me quite a while to become proficient at handling 80% hydration dough. Once you learn the trick to it, it’s very doable and there is no better feeling than handling a large boule of well developed soft dough.
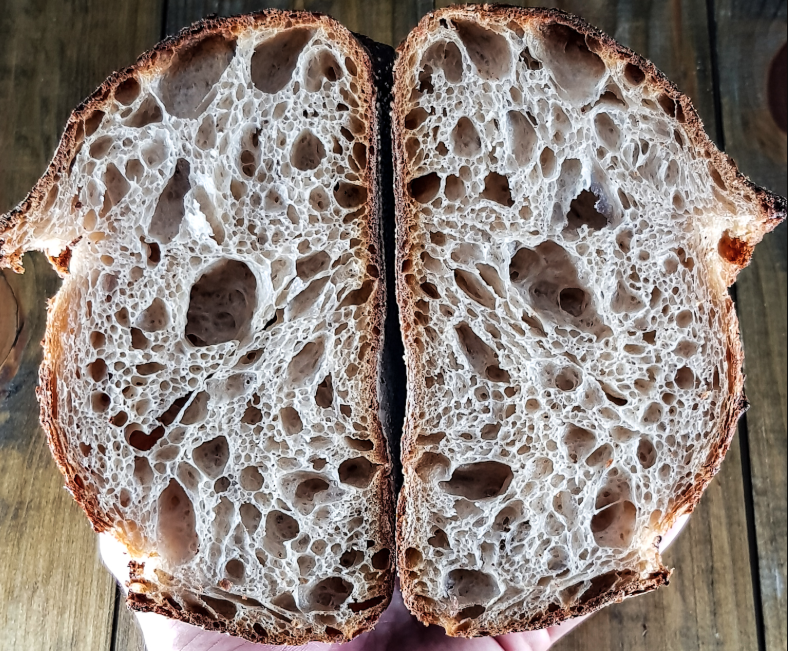
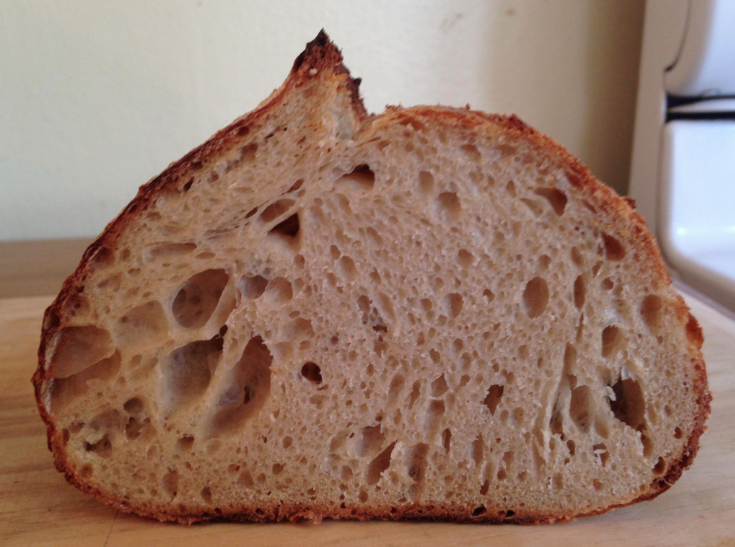
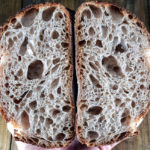
What does “Crumb” mean?
Crumb refers to the holes classically found in sourdough bread. Large open holes are a sure sign of a well fermented Sourdough bread. There is a knife edge we walk as bakers trying to make a dough that is both strong and pliable, capable of trapping that CO2. What we want is a tall loaf with large holes throughout the entire loaf. Here are two examples, one has a perfect open crumb and the other does not:
Does Sourdough bread have gluten?
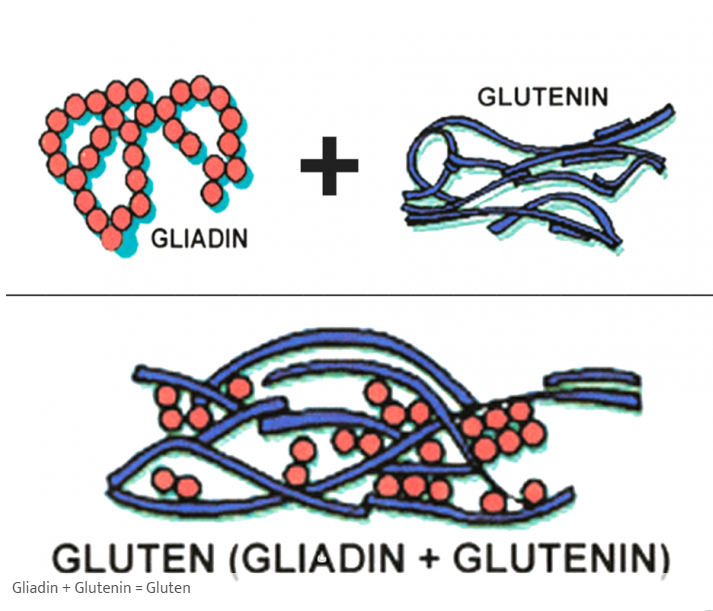
Yes. Sourdough bread has gluten. But before you run and hide, it’s important to understand what Gluten is and how we develop it. Basically the flour has two free floating proteins already, Gliadin and Glutenin. It isn’t until H2O (water) is incorporated that these two proteins actually bond together.
Once they are bonded together this new protein is call, Gluten. Check out the picture below – When the Gluten is formed there is space that is created, little pockets that are capable of trapping the fermented gasses inside. That is why gluten development is so important to bread making.
Now that you know the origin story, how gluten is developed, and you have a grasp on bakers percentages, let make a loaf.
What do the different steps mean? Autolyse? Bulk Fermentation?
Sourdough bread making has no shortage uniquely named stages. Lets go through a few of them here:
- Levain – is the term used to describe starter that has been fed with the intention of being combined with dough to make a loaf of bread. Basically levain is just starter that will be added to the mix.
- Autolyse – is a deceptively easy process that just involves mixing flour and water together until all the flour is dissolved. In bread making, this stage is used to make the dough more pliable and easy to work with before you add yeast or starter
- Bulk Fermentation – is the process of fermenting the dough before shaping it and proofing
- Proofing – after shaping your loaf, you will place it in a banneton (basket), bowl, or container in which the shaped dough can undergo it’s final rise
Beginner Sourdough Bread
Equipment
- Kitchen Scale (optional but highly recommended) – $23
- Bread Banneton (optional but recommended) – $29
- Glass mixing bowl – $24
- Bench Knife – $10
- Dutch oven / combo cooker – $43 (Required)
Ingredients
- 900g White Flour Look for flour with a high protein content
- 100g Whole Wheat
- 750g Filtered water (75%) Room temp.
- 200g Levain (20%) 1:2:2 (starter: flour: water)
- 20g Salt (2%) Do not use iodised salt – suggest fine sea salt
Instructions
Levain (Start at 9am)
- Let ferment for 4-5 hours
Autolyse (Start at 9am)
- Combine 900g of white flour + 100g of whole wheat flour with the 700g of filtered water (reserve 50g for when you add the Levain)
- Mix until all the flour is incorporated with the water, 2-3mins of stirring
- Cover with a clean damp kitchen towel or plastic wrap while Levain becomes active (be sure to cover as this prevents the mixture from developing a skin on the outer layer)
Main Dough (1pm)
- Add Levain to the reserved 50g of water
- Now combine the Levain/Water mixture to the Autolysed dough and really get in there and mix this baby by hand until the dough is homogeneous 5-10 mins
- Let rest for 20 mins
- Add salt and knead in the bowl for another 2-3 mins
- Cover and let rest for 1 hour at room temp (ideally somewhere between 75-80°)
Bulk Fermentation | Stretch and Folds (2:30pm)
- Perform the first stretch and fold – in which, you grab a corner of your dough and pull up as much as you can before the dough breaks and fold it over back over the top. Turn the bowl and repeat the stretching and folding for the other three corners
- Cover and let rest for 30 mins
- Repeat another series of stretch and folds then cover and let rest for 45 mins
- Repeat a third round of stretch and folds and again cover and rest for 45 mins or until the dough gets about 30-40% larger
Pre-Shaping (4:30pm)
- Gently release the dough out of the bowl and onto a very minimally floured work surface
- Using a bench scraper, cut the dough into two equally
- form the dough into a loose ball (boule) by using the bench scraper like a snowplow, sliding the dough
- Cover with the bowl and let rest for 10mins
Shaping (4:40pm)
- The idea here is that we want to create some tension on the outside of the dough that keeps the boule in it's shape during the final fermentation. So lightly flour the top of your dough and use a bench scraper to flip the dough over so the floured side is now on the work surface
- Now grab a corner and gently stretch it over the top of the dough, turn and repeat until a tighter ball is formed
- using the bench scraper, move the dough around the work surface. As you move the dough tension should be being create on the outside of the dough
- once the dough is taught, transfer to a WELL floured banneton bowl (this is where the dough will proof until you are ready to bake.
Final Fermentation (overnight)
- cover your boule and place in the fridge over night. The cool temp inside your fridge will slow down the fermentation time and allow some amazing flavors to develop while not allowing the bread to be over proofed.
Bake (the next day 9am)
- Preheat your oven to 500° for at least 30mins (ideally 1 hour) WITH your Dutch Oven or Combo-cooker inside with the lid on.
- Carefully take the dutch oven out of the oven and flip your dough out into the scorching hot Dutch Oven
- At this point you could score the loaf with a razor blade or just allow for the natural brakes in top of the bread to open up (I prefer the latter)
- Reduce the heat in your oven to 450°
- Place the lid on and bake for 24 mins
- Remove lid and bake another 20 mins or until the loaf is dark brown (most amateurs take their loaf out to early and don't allow for the deep flavors to develop in the crust)
- Tip the loaf out and allow it to cool down (for a pro tip, lean the loaf up so the weight of the loaf doesn't deflate the height you just created)
Finally! The perfect explanation! Thank you for breaking it down for everyone to understand.